|
|

Installing the Cisco 2500 Series Access Server
This chapter guides you through the installation of the Cisco 2500 series access server and includes the following sections:
![]()
Following are the tools and parts required to install the access server:
In addition, you might need the following external equipment:
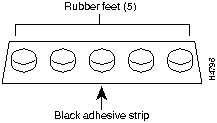
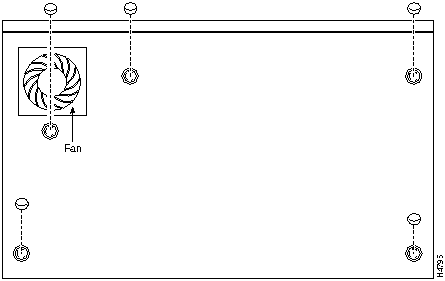
This section explains how to install the rubber feet on the bottom of the chassis. If you want to rack-mount the chassis, skip this section and proceed with the next section, "Rack-Mounting the Chassis." To wall-mount the chassis, skip this section and proceed with the section "Wall-Mounting the Chassis" later in this chapter.
Before placing the access server on a desktop, shelf, or other flat, secure surface, perform the following steps to install the rubber feet:
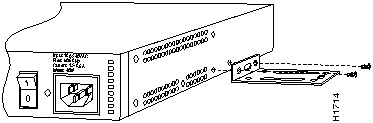
Figure 3-1 : Identifying the Rubber Feet
Figure 3-2 : Installing the Rubber Feet
Depending on the rack you are using, attach the rack-mount brackets to the chassis using one of the following figures as a guide:
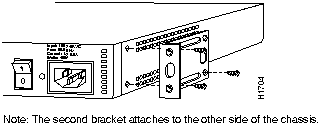
To install the chassis in a 19-inch rack with the front panel forward, attach the rack-mount brackets as shown in Figure 3-3.
Figure 3-3 : 19-Inch Rack Installation---Front Panel Forward
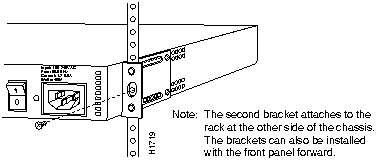
To install the chassis in a 19-inch rack with the rear panel forward, attach the rack-mount brackets as shown in Figure 3-4.
Figure 3-4 : 19-Inch Rack Installation---Rear Panel Forward
To install the chassis in a 19-inch, center-mount telco rack, attach the rack-mount brackets as shown in Figure 3-5.
Figure 3-5 : Telco Rack Installation---Rear Panel Forward
Using the screws you provide, attach the chassis assemblies to the rack as shown in Figure 3-6.
Figure 3-6 : Attaching the Chassis to the Rack---Rear Panel Forward
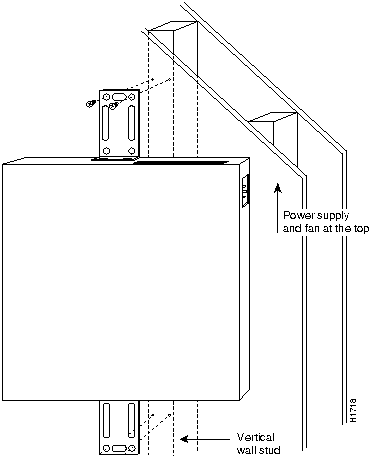
Following is the procedure for wall-mounting the chassis:
Figure 3-7 : Attaching the Wall-Mount Brackets
Figure 3-8 : Wall-Mounting the Chassis
Take the following steps to connect the access server to your networks:
Figure 3-9 : Connecting Ethernet Transition Cables
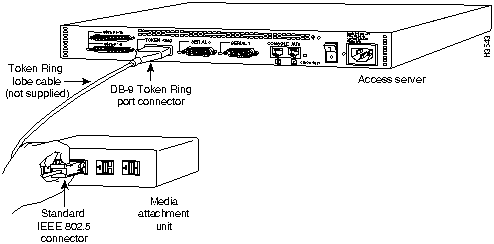
Figure 3-10 : Connecting Token Ring Cables
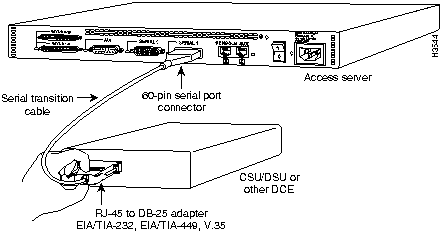
Figure 3-11 : Connecting Synchronous Serial Cables
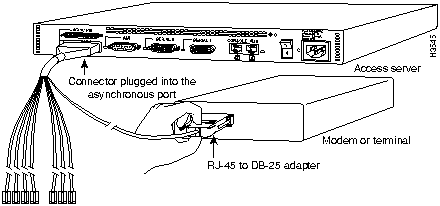
Figure 3-12 : Connecting Asynchronous Serial Cables
Connecting the Console Terminal and Modem
The console terminal is used to provide local administrative access to the access server. Connect the terminal to the console port. The auxiliary port can be used for with a terminal, or with a modem for remote access.
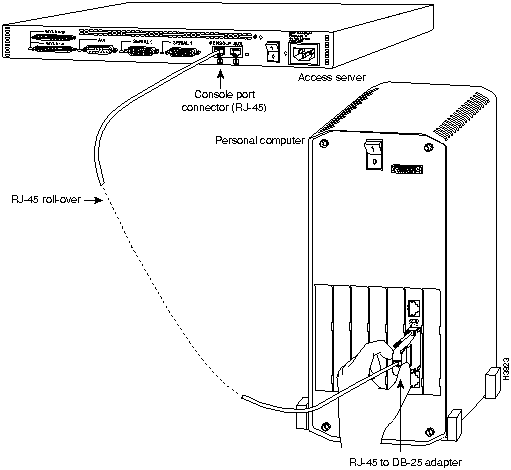
Connecting to the Console Port
This section explains how to connect a terminal (an ASCII terminal, or a PC running terminal emulation software) to the console port on the access server:
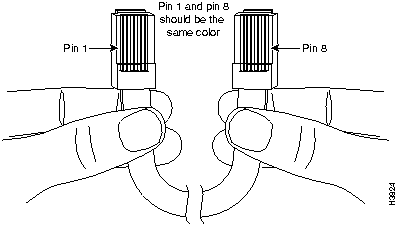
Figure 3-13 : Identifying a Roll-Over Cable
Figure 3-14 : Connecting the Console Terminal
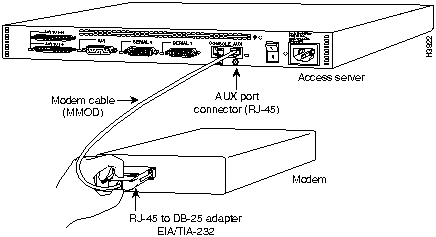
Connecting a Modem to the Auxiliary Port
This section explains how to connect a modem to the console port on the access server:
Figure 3-15 : Connecting a Modem to the Auxiliary Port
What to Do after Installing the Access Server Hardware
After you install the access server hardware, the system is ready to be powered on and configured. For information on software configuration, refer to the chapter "Configuring the Cisco 2500 Series Access Server."
Copyright 1988-1996 © Cisco Systems Inc.


![]()

![]()
![]()
![]()
![]()
![]()
![]()
![]()
![]()
![]()