|
|
Installing the Adapter Software
This chapter explains how to install the workgroup EISA SCO adapter software. If you ever need to remove the software from your system, see the appendix "Deinstalling the EISA SCO Adapter Software."
To install the EISA SCO adapter software, you need an EISA workstation with a 1.4-megabyte (MB) floppy disk drive.
You should be familiar with the UNIX system and a UNIX text editor. You also need to know the following:
For the SCO Unix System Release 3.2 installation, you should have 2 MB of disk space in the /usr directory. Make sure you have available space in your root directory for the SCO software. Use the df command to check available disk space.
The installation procedure is separated into the following steps:
Each of these procedures is described in the follow sections.
After you install the EISA SCO adapter using the procedures in the Workgroup CDDI/FDDI EISA Adapter Hardware Installation manual, you must configure the adapter base address and interrupt number.
To configure the EISA slot, proceed as follows:
![]()
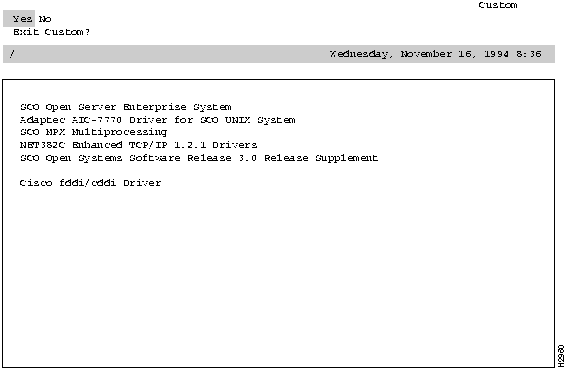
Use the following procedure to install the SCO adapter driver files using the SCO custom configuration utility.
# custom
Figure 2-1 Initial Custom Screen
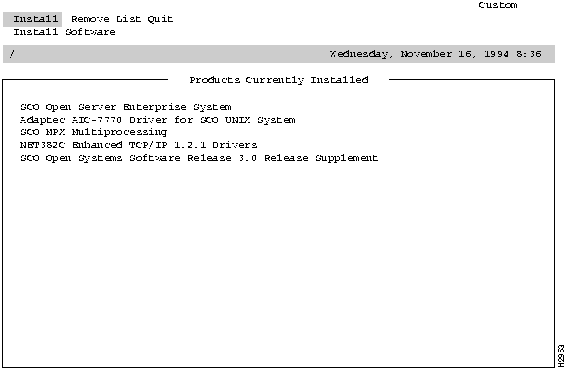
Figure 2-2 Existing Driver Screen
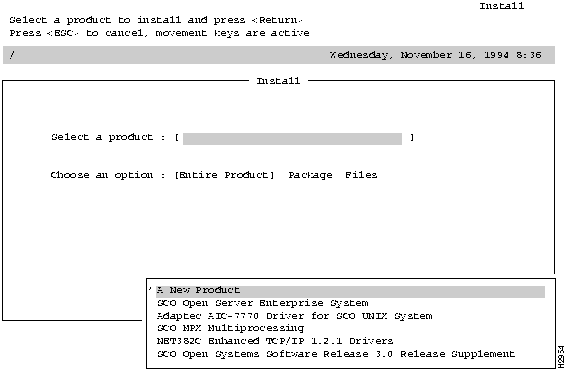
Figure 2-3 Install A New Product Screen
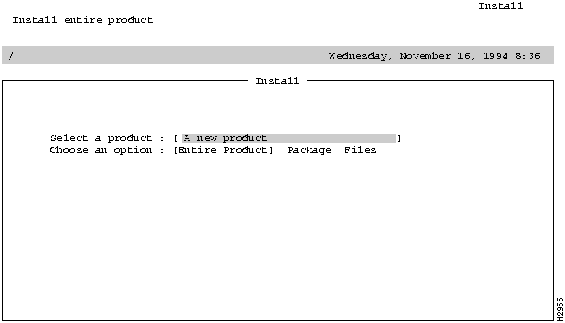
Figure 2-4 Selected Product Confirmation Screen
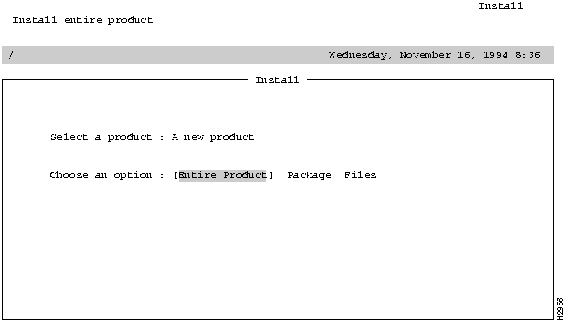
Figure 2-5 Custom Choose and Option Prompt
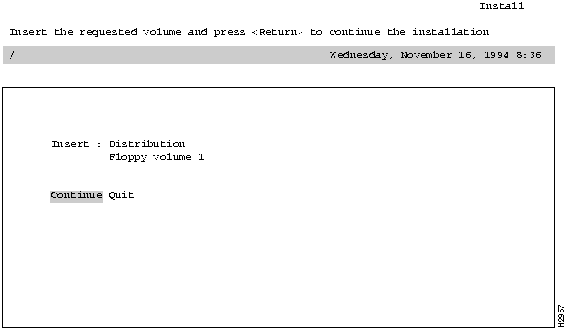
Figure 2-6 Custom Driver Confirmation Prompt
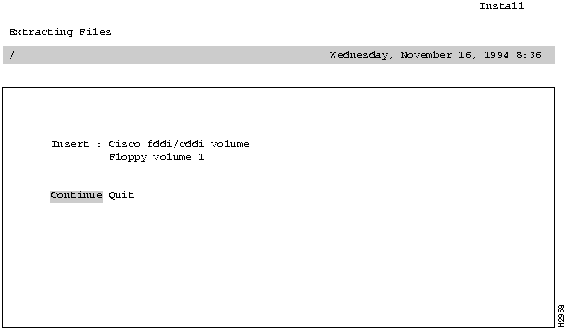
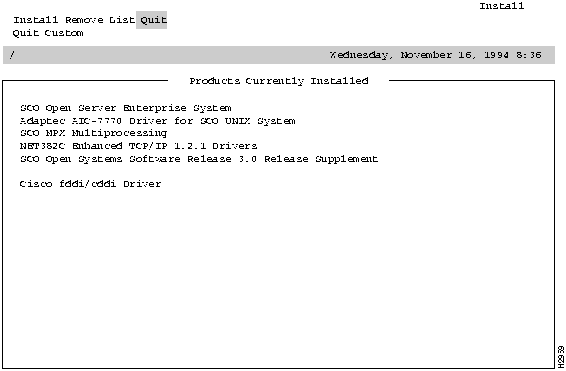
Figure 2-8 Quit Confirmation Screen
#
To complete the SCO adapter driver installation, continue with the netconfig procedure, which is described in the next section.
Following is the procedure for configuring the kernel using the SCO netconfig utility:
# netconfig
        Currently configured chains:
   1. nfs->sco_tcp
  nfs  SCO NFS Runtime System for SCO Unix
  sco_tcp  SCO TCP/IP for UNIX
   2. sco_tcp->lo0
  sco_tcp  SCO TCP/IP for UNIX
  lo0  SCO TCP/IP Loopback driver
Available options:
   1. Add a chain
   2. Remove a chain
   3. Reconfigure an element in a chain
   q. Quit
Select option: 1
Num  Name      Description
  1. lmxc      SCO LAN Manager Client
  2. nfs      SCO NFS Runtime System for SCO Unix
  3. sco_ ipx     SCO IPX/SPX for UNIX
  4. sco_ tcp     SCO TCP/IP for UNIX
Select top level of chain to Add or q to quit: 4
Add chain : sco_tcp->
Num  Name  Description
 1. ctr0  Compaq Token Ring driver, unit 0
 2. e3A0  3Com 501 Ethernet driver, board 0
 3. e3B0  3Com 503 Ethernet driver, board 0
 4. e3D0  3Com 507 Ethernet driver, board 0
 5. exos0  Excelan 205 Ethernet driver, board 0
 6. fddi0  CISCO FDDI driver, board 0
 7. hpe0  HP EISA-32 Slave LAN Adapter 0
 8. hpi0  HP ISA(AT) LAN Adapter 0
 9. i3B0  Racal InterLan LLI ES-3210 STREAMS Driver, board 0
10. i6E0  Racal InterLan LLI NI-6510 STREAMS Driver, board 0
11. lo0  SCO TCP/IP Loopback driver
12. nat0  Novell NE2000 Ethernet driver, board 0
13. ne0  Novell NE3200 Bus Master Ethernet Driver, unit 0
14. ppp0  PPP Interface 0
15. sl0  SLIP Interface 0
16. tok0  IBM Token Ring Network Adapter driver, board 0
17. wdn0  SMC/WD 8003/8013 Series driver, board 0
Select next level of chain to Add or q to quit: 6
Add chain sco_tcp->fddi0 (y/n): y
Adding: sco_tcp->fddi0
Configuring CISCO FDDI card 0
Installing the fddi driver into the link kit
Enter IRQ (3 5 7 9 11 12 15) [11] or 'q' to quit: 3
Enter slot number (0 1 2 3 4 5 6 7 8 9) or 'q' to quit: 2
Configuring fddi0 in slot 2
Installing SCO TCP/IP over fddi0
Please enter the following information in order to configure fddi0
Enter the internet address of this interface: 198.133.219.103
Enter the netmask for this interface (default: 255.255.255.0):
Does the interface use a broadcast address of all 1's? (y/n) (default: y) : y
Enter the broadcast address for this interface (default: 198.133.219.255): y
Interface Address:    198.133.219.103
Netmask:      255.255.255.0
Broadcast address:    198.133.219.255
Are these values correct? (y/n): y
Enter local host name or enter q to quit [CiscoFDDI]: CiscoFDDI
32 Pseudo ttys are currently configured, do you want to:
    1. Add Pseudo ttys
    2. Remove Pseudo ttys
Select an option or enter q to quit [q]: q
256 TCP connections currently configured, do you want to:
    1. Add TCP Connections
    2. Remove TCP Connections
Select an option or enter q to quit [q]: q
TCP/IP Configuration Complete.
Currently configured chains:
   1. nfs->sco_tcp
  nfs  SCO NFS Runtime System for SCO Unix
  sco_tcp  SCO TCP/IP for UNIX
   2. sco_tcp->lo0
  sco_tcp  SCO TCP/IP for UNIX
  lo0  SCO TCP/IP Loopback driver
   3. sco_tcp->fddi0
  sco_tcp  SCO TCP/IP for UNIX
  fddi0  CISCO FDDI driver, board 0
Available options:
   1. Add a chain
   2. Remove a chain
   3. Reconfigure an element in a chain
   q. Quit
Select option: q
Do you want to relink the kernel now? y
  The UNIX Operating System will now be rebuilt.
  This will take a few minutes.  Please wait.
  Root for this system build is /.
  The UNIX Kernel has been rebuilt.
Do you want this kernel to boot by default? (y/n) y
Backing up /unix to /unix.old
Installing new /unix
The kernel environment includes device node files and /etc/inittab.
The new kernel may require changes to /etc/inittab or device nodes.
Do you want the kernel environment rebuilt? (y/n) y
The kernel has been successfully linked and installed.
  To activate it, reboot your system.
Setting up new kernel environment
#
Once your command line prompt reappears, the adapter installation is complete.
When you install an FDDI EISA SCO adapter in a system with an existing Ethernet interface, the adapter automatically is able to function using both the FDDI and Ethernet networks. The workstation is known to the Ethernet network by its Ethernet IP address and host name, and to the FDDI network by its FDDI IP address and host name.
Stations on an internetwork can be reached via multiple routes. When a standard SCO system is booted, the route daemon sends out packets over both the Ethernet and the FDDI networks. The route daemon determines the optimal route between stations by relative hop count, not by the speed of the interface. Therefore, in cases where the hop counts are equal, the use of FDDI is not guaranteed. You can guarantee the use of FDDI for network commands by specifying the FDDI host name or IP address of the destination workstation.
The network diagram in Figure 2-9 is used to describe a way to guarantee mounting systems over the FDDI network.
Figure 2-9 Setting Up a Router
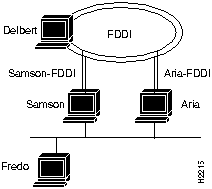
If a user on Fredo mounts files on Delbert, then NFS traffic goes over the Ethernet to either Samson or Aria and from there over an FDDI network to Delbert. However, if a user on Samson mounts files on Aria, the NFS traffic can go over either the FDDI or Ethernet. The user can specify which interface to use by including Aria's FDDI or Ethernet host name in the mount command as follows:
fredo@samson => mount aria:/usr/etc/install /usr/etc/install
fredo@samson => mount aria-FDDI:/usr/etc/install /usr/etc/install
Both these commands mount to the same physical files on Aria. However, the first results in NFS traffic being routed over the Ethernet network, while the second results in NFS traffic being routed over the FDDI network.
|
|
Copyright 1988-1995 © Cisco Systems Inc.