|
|

Installing the Universal Access Server
This chapter guides you through the installation of the access server and includes the following sections:
![]()
You need the following tools and parts to install the access server:
In addition, you might need the following external equipment:
You can set the chassis on a desktop, install it in a rack, or other flat surface. Use the procedure in this section that best fits the needs of your network.
Setting the Chassis on a Desktop
Before setting the access server on a desktop, shelf, or other flat, secure surface, the follow these steps to install the rubber feet:
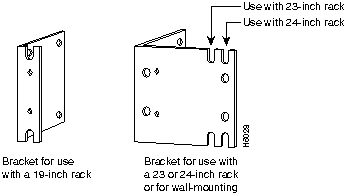
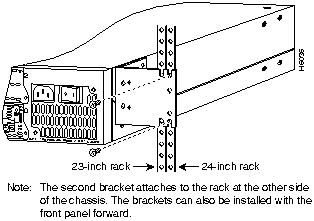
This section describes the procedures for rack-mounting the chassis. The chassis comes with a bracket for use with a 19-inch rack or, if specified in your order, an optional larger bracket for use with a 23-inch or 24-inch rack. The brackets are similar to those shown in Figure 3-1.
Figure 3-1 : Identifying the Rack-Mounting Brackets
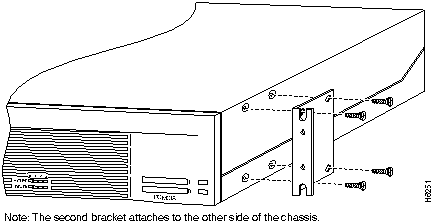
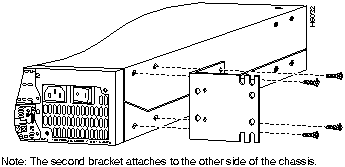
To install the chassis in a rack with the front panel forward, attach the brackets on each side of the chassis as shown in Figure 3-2 or Figure 3-3.
Figure 3-2 : Bracket Installation for a 19-Inch Rack---Front Panel Forward
Figure 3-3 : Bracket Installation for a 23-Inch or 24-Inch Rack---Front Panel Forward
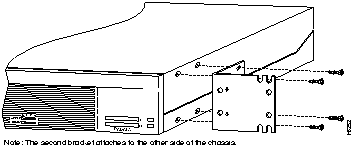
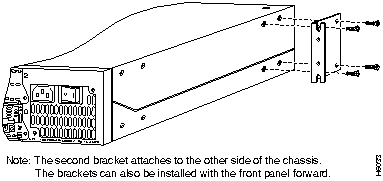
To install the chassis in a rack with the rear panel forward, attach the brackets on each side of the chassis as shown in Figure 3-4 or Figure 3-5.
Figure 3-4 : Bracket Installation for a 19-Inch Rack---Rear Panel Forward
Figure 3-5 : Bracket Installation for a 23-Inch or 24-Inch Rack---Rear Panel Forward
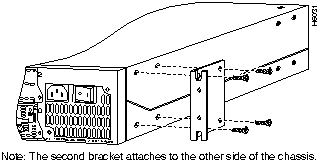
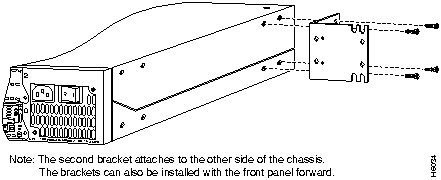
To install the chassis in a center-mount telco rack, attach the brackets on each side of the chassis as shown in Figure 3-6 or Figure 3-7.
Figure 3-6 : Bracket Installation for a 19-Inch Rack---Rear Panel Forward
Figure 3-7 : Bracket Installation for a 23-Inch or 24-Inch Rack---Rear Panel Forward
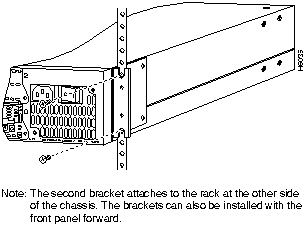
After the brackets are secured to the chassis, you can rack-mount the chassis. Using the screws you provide, attach the chassis to the rack as shown in Figure 3-8 or Figure 3-9.
Figure 3-8 : Attaching the Chassis to the 19-Inch Rack---Rear Panel Forward
Figure 3-9 : Attaching the Chassis to the 23-Inch or 24-Inch Rack---Rear Panel Forward
This section describes how to connect the access server to your network using the Ethernet (AUI) or dual T1 Primary Rate Interface (PRI) cards.
The cables required to connect the access server to a network are not provided. For ordering information, contact customer service or see the appendix "Cabling Specifications for the Universal Access Server" for cable and port pinouts.
Do not work on the system or connect or disconnect cables during periods of lightning activity. (To see translated versions of this warning, refer to the Regulatory Compliance and Safety Information document that accompanied the access server.)
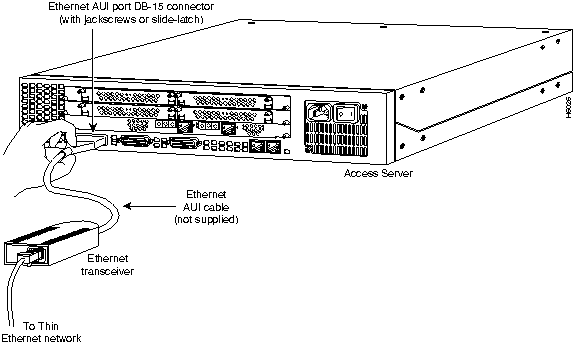
Connecting to an Ethernet Network
The access server uses an Ethernet AUI to connect to your Ethernet network. Connect the access server to your Ethernet network with an Ethernet transition cable from the Ethernet AUI port to an Ethernet transceiver. See Figure 3-10.
Figure 3-10 : Connecting to an Ethernet Transceiver
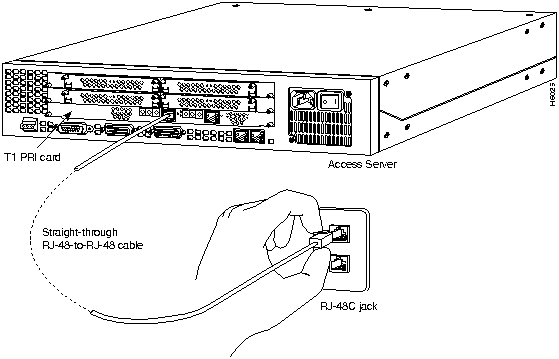
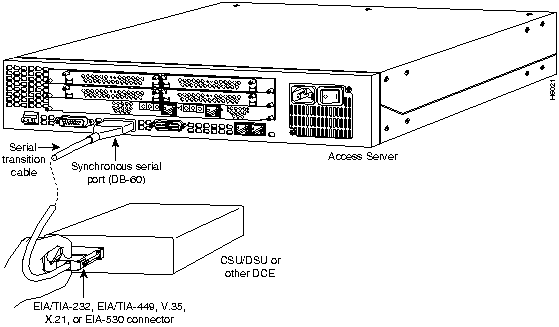
Follow these steps and use the illustrations in this section to connect the access server through the PRI card to your WAN:
Figure 3-11 : Connecting the T1 PRI Card to an RJ-48C (T1) Jack
Figure 3-12 : Connecting Synchronous Serial Cables
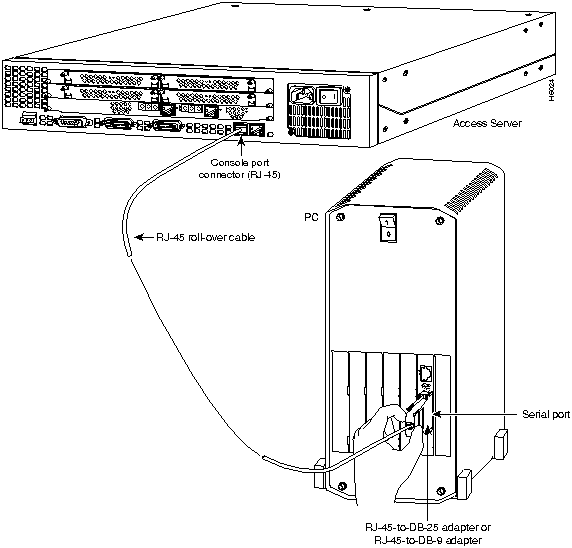
Connecting the Console Terminal and Modem
Use the console terminal for local administrative access to the access server. You can only connect a terminal to the console port. You can use the auxiliary port to connect a terminal or a modem for remote access to the access server.
Connecting to the Console Port
Follow these steps to connect a terminal (an ASCII terminal or a PC running terminal emulation software) to the console port on the access server:
Figure 3-13 : Connecting the Console Terminal
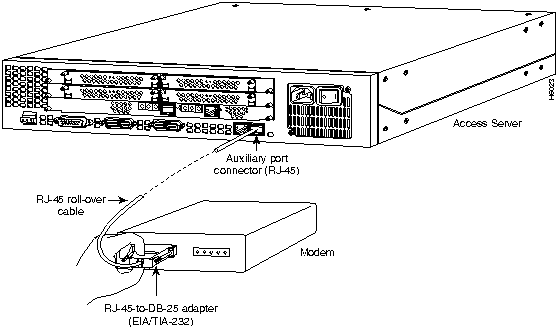
Connecting a Modem to the Auxiliary Port
Follow these steps to connect a modem to the auxiliary port on the access server:
Figure 3-14 : Connecting a Modem to the Auxiliary Port
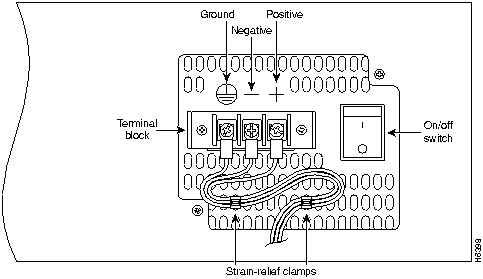
If you ordered the access server with a DC power supply, follow the procedure in this section to wire the terminal block.
Figure 3-15 shows the DC power supply terminal block. Follow these steps to wire the terminal block:
Figure 3-15 : DC Power Supply Connections
Copyright 1988-1996 © Cisco Systems Inc.
![]()
![]()
![]()
![]()
![]()
![]()
![]()
![]()
![]()
![]()
![]()
![]()
![]()
![]()
![]()
![]()
![]()